How to claim GST refund of excess balance in Cash Ledger?
RFD-01: a step-by-step guide to claim GST refund of excess balance in Electronic Cash Ledger of GST Portal
There can be a lot of mistakes while creating GST challan for making GST Payment, it may be due to confusion, deadlines pressure or due to wrong interpretation of the columns while creating challan, this results into temporary blockage of funds in the Electronic Cash Ledger & a war between us and clients. I’m one among the suffered, by wrong interpretation of late fee as a penalty while creating challan and end up with blockage of funds in Cash ledger since September 2017.
But, by the initiative of GSTN, there are no more hassles, we can get the GST refund of the balance reflecting in Electronic Cash Ledger by filing a simple Online application for refund viz., RFD-01 within minutes.
In this article, I made an attempt to explain step-by-step guide for filing RFD-01 with pictures wherever necessary by following simple steps, hope you will enjoy it.
Please note that the excess GST paid can be claimed as a refund within 2 years from the date of payment. This means that if excess GST is paid in the month of January 2018, GST refund application RFD-01 can be submitted until January 2020 only.
Here is a step by step Guide to File RFD – 01 on GST Portal:
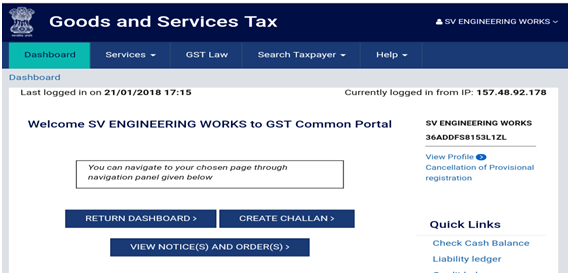
Step 1: Login to GST Portal at with your login credentials
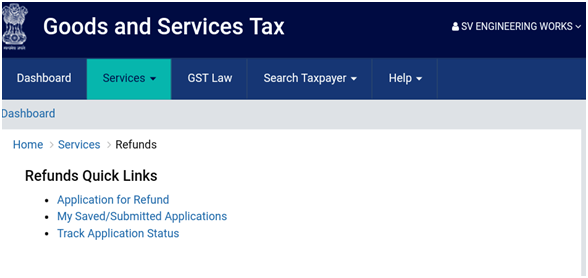
Step 2: Click on Services tab > Refunds > Application for Refund
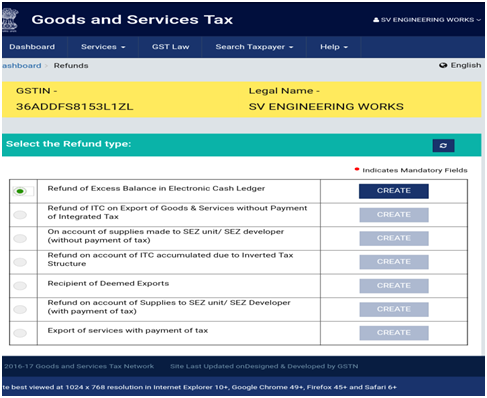
Step 3: Select the topmost option naming Refund of Excess Balance in Electronic Cash Ledger and click on ‘CREATE’
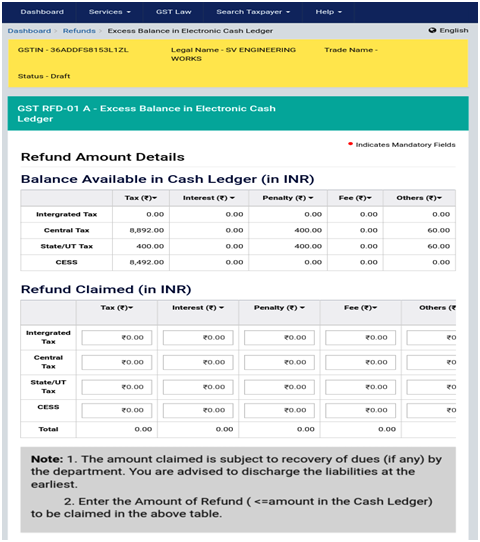
Step 4: Once you click on ‘CREATE’, a screen will appear reflecting all balances in the Electronic Cash Ledger
Enter values of the refund to be claimed in the ‘Refund Claimed’ table subject to maximum available balance in Cash ledger showing above the Refund Claimed table
Step 5: Select the Bank Account from the drop-down list, if you wish to get the refund in bank account other than appearing in the drop-down list, file non-core amendment registration and add new bank details and click on ‘SAVE’ and then PROCEED.
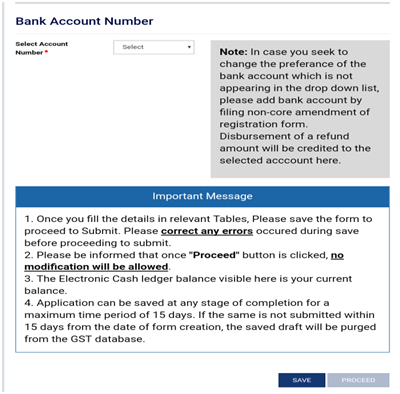
Step 6: Click on the checkbox and Select the name of the ‘Authorised Signatory’ from the drop-down list and click on ‘SUBMIT WITH DSC’ or ‘SUBMIT WITH EVC’ as per your availability.
Enter the EVC sent to your registered mobile number and email to submit the form RFD-01
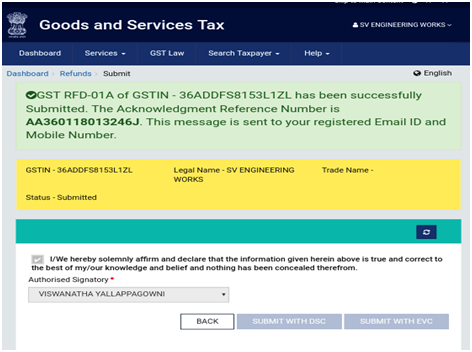
Once RFD-01 is submitted Refund ARN Receipt is generated in PDF format as shown below
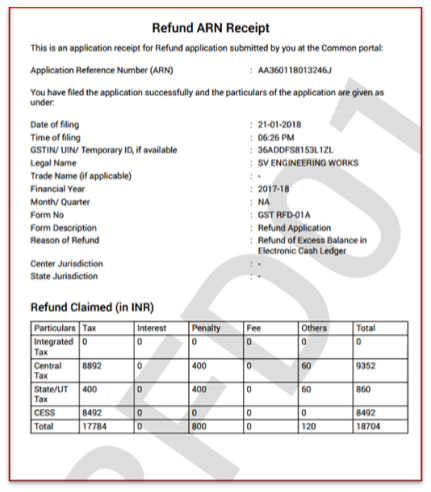
Submit Refund ARN receipt along with the copy of your GST registration certificate to your Jurisdictional GST Office, after inspection by a GST officer refund will be credited to the bank account.
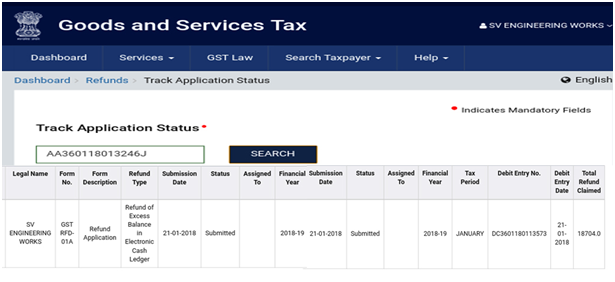
You can also track your status of submitted RFD-01 application by going to Services tab > Refunds > Track application status > enter ARN number and click on search.
As of now GSTN not specified any time limit for processing of Refund application RFD-01 but generally application will be processed and amount will be credited into bank account within Thirty (30) days but soon CBEC will cut-short this time limit for processing refund application and hope going forward GSTN will process refund applications instantly like how E-commerce sites were doing.